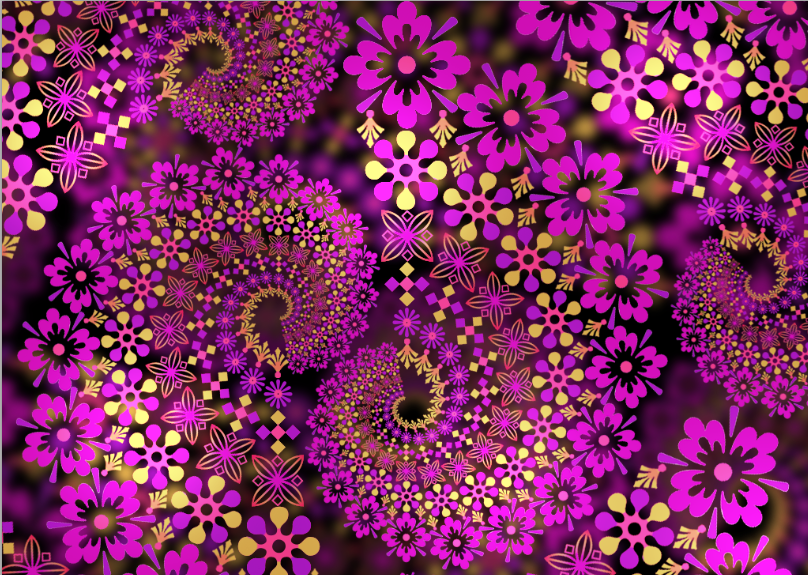
How to Create Your Own Fractal-Style Design Using Photoshop
In this Photoshop tutorial, you will learn how to create your own “fractal” style design. Keep in mind that technically we are not creating a fractal; we are just copying the same aesthetic elements onto our design. Let us get started.
Fractals in geometric terms, is a pattern or figure that can be split into parts, each of which is (at least approximately) a reduced-size copy of the whole. It is a concept called self-similarity and gives you highly similar patterns even as you close in on its different parts. In the end, the result is a beautiful pattern that looks totally organized or symmetrical, yet fragmented and askew at the same time. That is why some people actually want to use the same “style” of fractals for creative pursuits in print and web design.
STEP 1
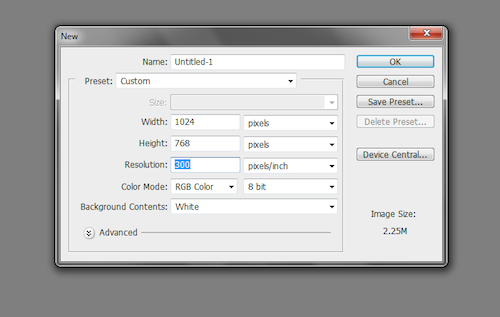
First, will we setup our document. In this tutorial, we will be using the preset values in Photoshop, but we will also set a high resolution so that you can also use this in print (if you need to). Once Adobe Photoshop is open, we just press CTRL+N to create a new document and then we alter the resolution setting. Compare your settings with the values below.
- Width: 1024 pixels
- Height: 768 pixels
- Resolution: 300ppi
- Color Mode: RGB (for web) or CMYK (for print), the choice is yours
STEP 2
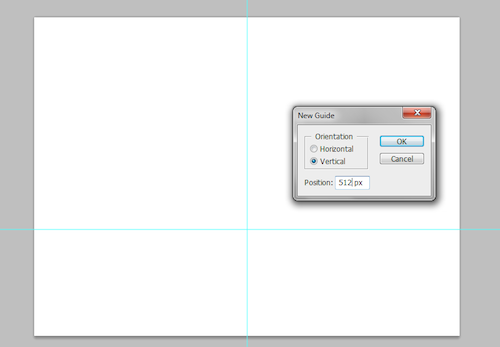
Once the document is set, our next move is to add first some perspective guidelines. This is important since you will not get the correct kind of scaling and positioning without a few key crucial points and line guides. The first set of guidelines will be our classic reference points for the center. Go to View -> New Guide… On the window that opens you should be able to set a guideline with a specific orientation and distance from the top or left edge of the document. We will create 2 using these specifications:
- Center Guide: Vertical -512 pixels
- Lower Horizontal Guide: Horizontal – 512 pixels pixels
STEP 3
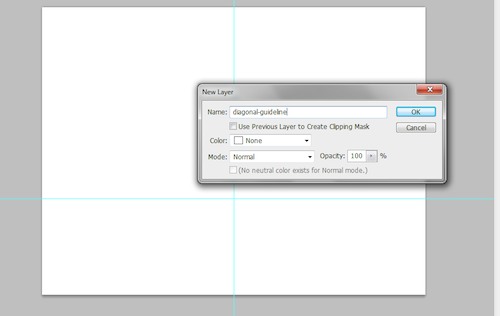
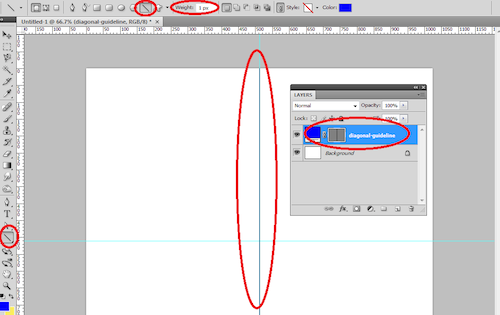
Then, we create a new layer. Go to Layer -> New Layer… Name this layer “diagonal guideline” in the window that opens.
STEP 4
We will now use the LINE TOOL to create our diagonal guides. Just select the line tool in the tools panel. Set the Weight of the line tool to 1 pixel (at the options bar above). Make sure you set your color to something distinct, such as a pure blue or vivid red. Once set, create the line by following the vertical guideline we just created earlier. Hold down the SHIFT key to make sure it is a straight line.
STEP 5
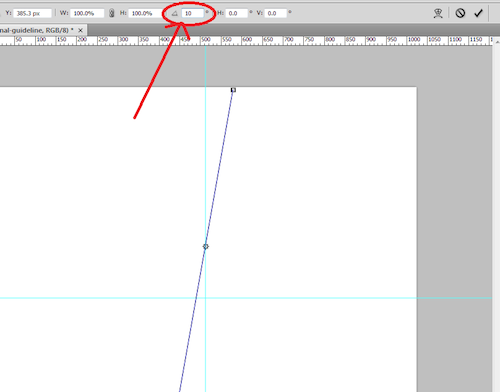
With the line layer still selected, press CTRL+T. This enables the transformation mode for layers and shapes. Once activated, look at your options bar above. You will see several settings and options for the transformation. Look for the value that governs the angle, it usually has the “angle” icon. Set the angle of our line layer to 10 degrees to rotate it as much.
STEP 6
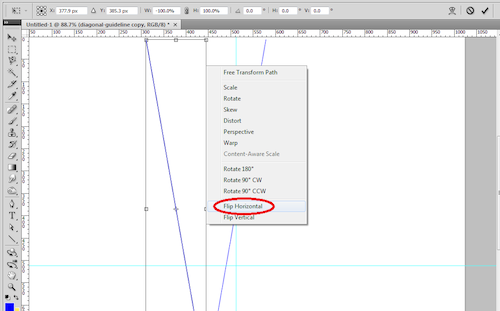
Next, we duplicate the line layer by simply pressing CTRL+J. We then transform the duplicate line by pressing CTRL+T. Once the transformation box appears, right click on it and then select the option “flip horizontal” in the context menu that appears. This gives us two lines for the perspective view.
STEP 7
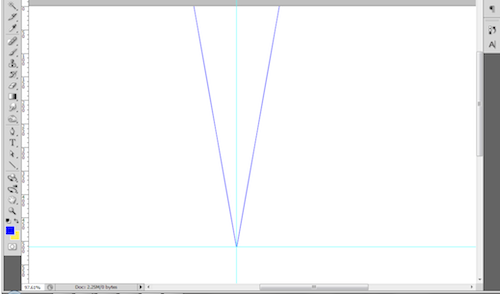
Then we position our perspective guidelines in such a way that their meeting point is also at the intersection of our original guidelines. Once done, make sure you save your document.
STEP 8
Great! Now, we just add a black background by just using the paint bucket tool on the background layer. Of course, you can use any theme color if you like here.
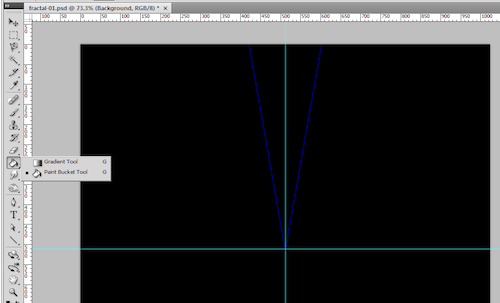
STEP 9
The next step is to add the shapes for the fractal effect itself. There are lots of different free sources for fractal shapes. You can either download those or create your own fractal shapes in illustrator. In our case to make things easier, we actually use the built in custom shapes in Adobe Photoshop. We just use the custom shape tool and choose one creative shape from the shape gallery. We position it on the top part within the perspective guidelines like so.
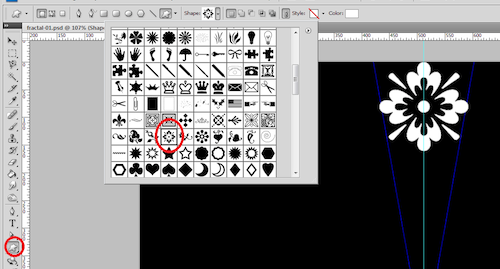
STEP 10
The next step is to add some colors. To do this we will first rasterize the layer. To do this, simply right click on the shape and select the option to “rasterize” it.
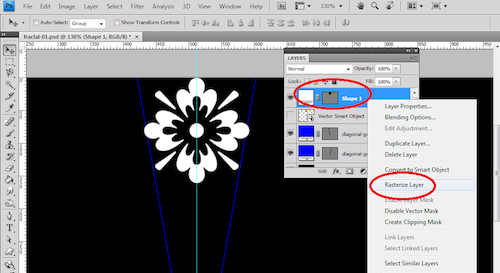
STEP 11
Then, we hold the CTRL key and then click on the layer thumbnail image in the layers panel. This selects the area of the shape. We then use a simple brush to color the parts of the shape into different theme hues.

STEP 12
We then just keep on adding other shapes/effects within the perspective lines. Make sure that you scale them properly (CTRL+T) fitting each shape within the guidelines. Of course color them appropriately with your theme color.
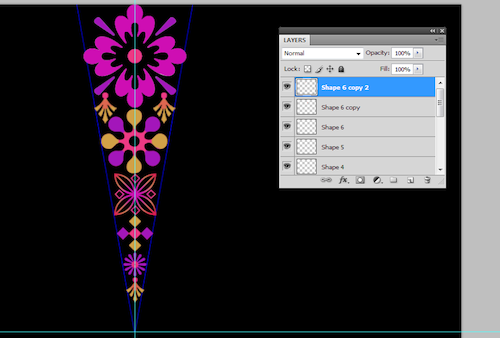
STEP 13
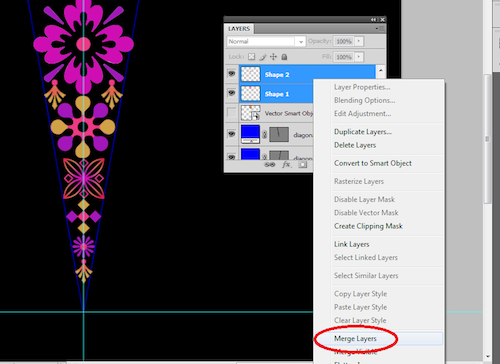
The next step is to merge the layers to make them easier to manipulate. Simply select all the layers and then right click on them. Look for the merge layers option and click on it.
STEP 14
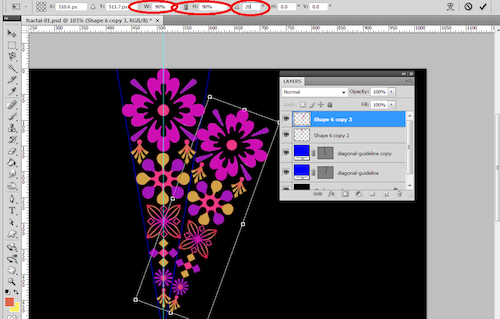
Now, duplicate this merged layer by pressing CTRL+J. Once duplicated, select the duplicate and then press CTRL+T to start transforming it. Look at the options bar and reduce both the width and height values to 90%. Also change the rotation angle to 20%. Make sure you reposition the new layer as needed so that we have a pivoting pattern from the center.
STEP 15
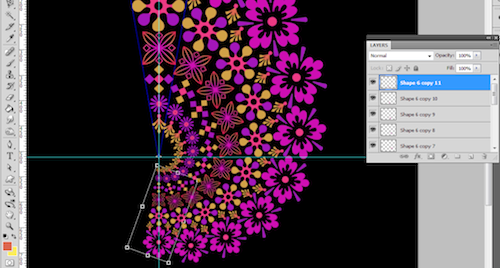
Just repeat the process over and over. You will see the fractal design style appear. Make sure to always adjust the angle by 20 degrees. Also always reduce the size by 90% for all dimensions. Take note as well that we are dragging the center anchor to the center source of the design so that it rotates correctly.
STEP 16
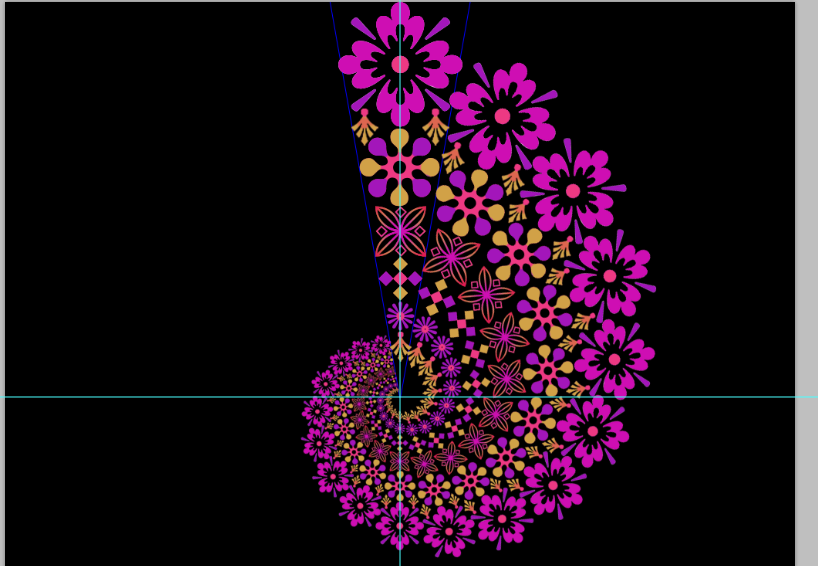
Once it is finished, it should look like this.
STEP 17
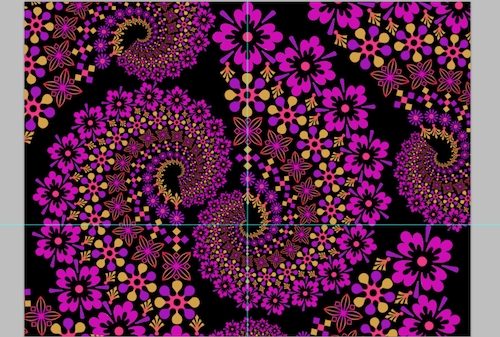
The next step is to merge all the layers that we created into one fractal layer. Just use the same technique before. Then, duplicate it, resize it a bit, and use these duplicates to fill all the other empty spaces creatively. We actually probably need to save this document to be safe as well of course.
STEP 18
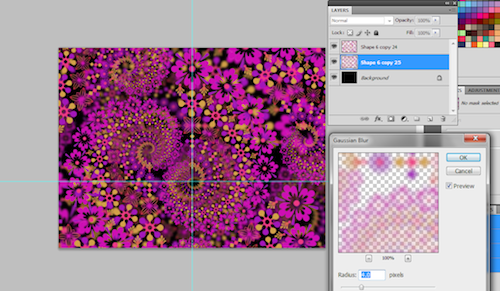
Next, duplicate all the merged fractals into one place. Then go to Filter ->blur Gaussian blur. With the main document selected adjust the slider until you have just a slightly blurred image.
STEP 19
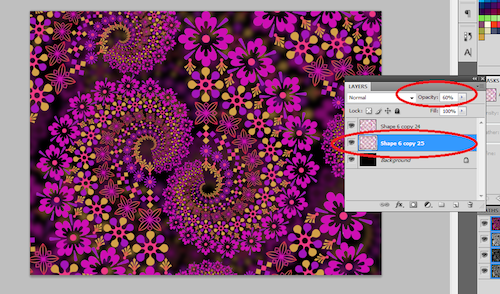
Then, we reduce the opacity of the blurred duplicate to around 30%.
STEP 20
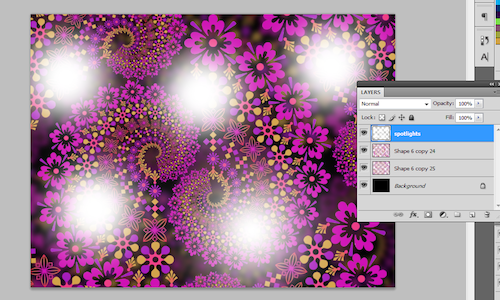
Finally, we create a new layer for our last effect. Once the new layer
STEP 21
Then, we just change the blend mode of this layer to “Overlay”.
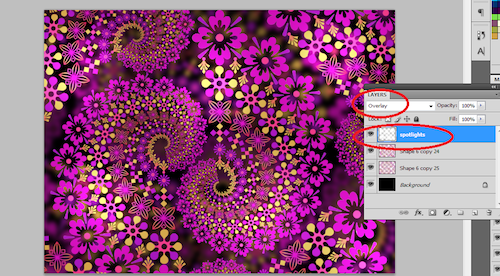
FINAL IMAGE
Great! That finishes our fractal tutorial. You can use all of these tricks for your own custom game and design of course.
